Torque measurements up to 250 kNm for all types of vehicles. Innovative torque measurement technology for simple and special measurement during drivetrain testing.
Drive systems using internal combustion engines or electric motors or hybrid drive systems place special demands on the development and creation of the drivetrain. Early drivetrain testing significantly assists the manufacturer in the endeavour of optimising low-emission transmissions and powertrain concepts. Fully developed torque measurement technology is a key factor for effectively operating drivetrain test benches. As the leading specialist for drivetrain testing, ATESTEO offers reliable measurements on the test bench and has clearly expanded the possibilities beyond passenger vehicle applications with torque measurement technology of up to 250 kNm.
Lowering of CO2 emissions values; thus, of the fuel consumption of commercial and heavy-duty vehicles as well, are environmental and economic goals that will be implemented throughout the European Union (EU) in the coming years. By 2030, the CO2 emissions of lorries, trucks, and heavy-goods vehicles are even to lie under 30% of the current values. The manufacturers of commercial and utility vehicles, especially of heavy ones, are challenged in this respect during drivetrain development. ATESTEO supports them with torque data acquisition on the drivetrain at an early point in the development phase. Because commercial and utility vehicles pose special challenges to vehicles, engines, transmissions, and drive technology, a team of experienced torque technology specialists at ATESTEO develop torque measurement sensors for special measurements on rail vehicles, commercial vehicles, utility vehicles, heavy-goods vehicles, and off-road applications.
Performance test benches for heavy-duty commercial and utility vehicles
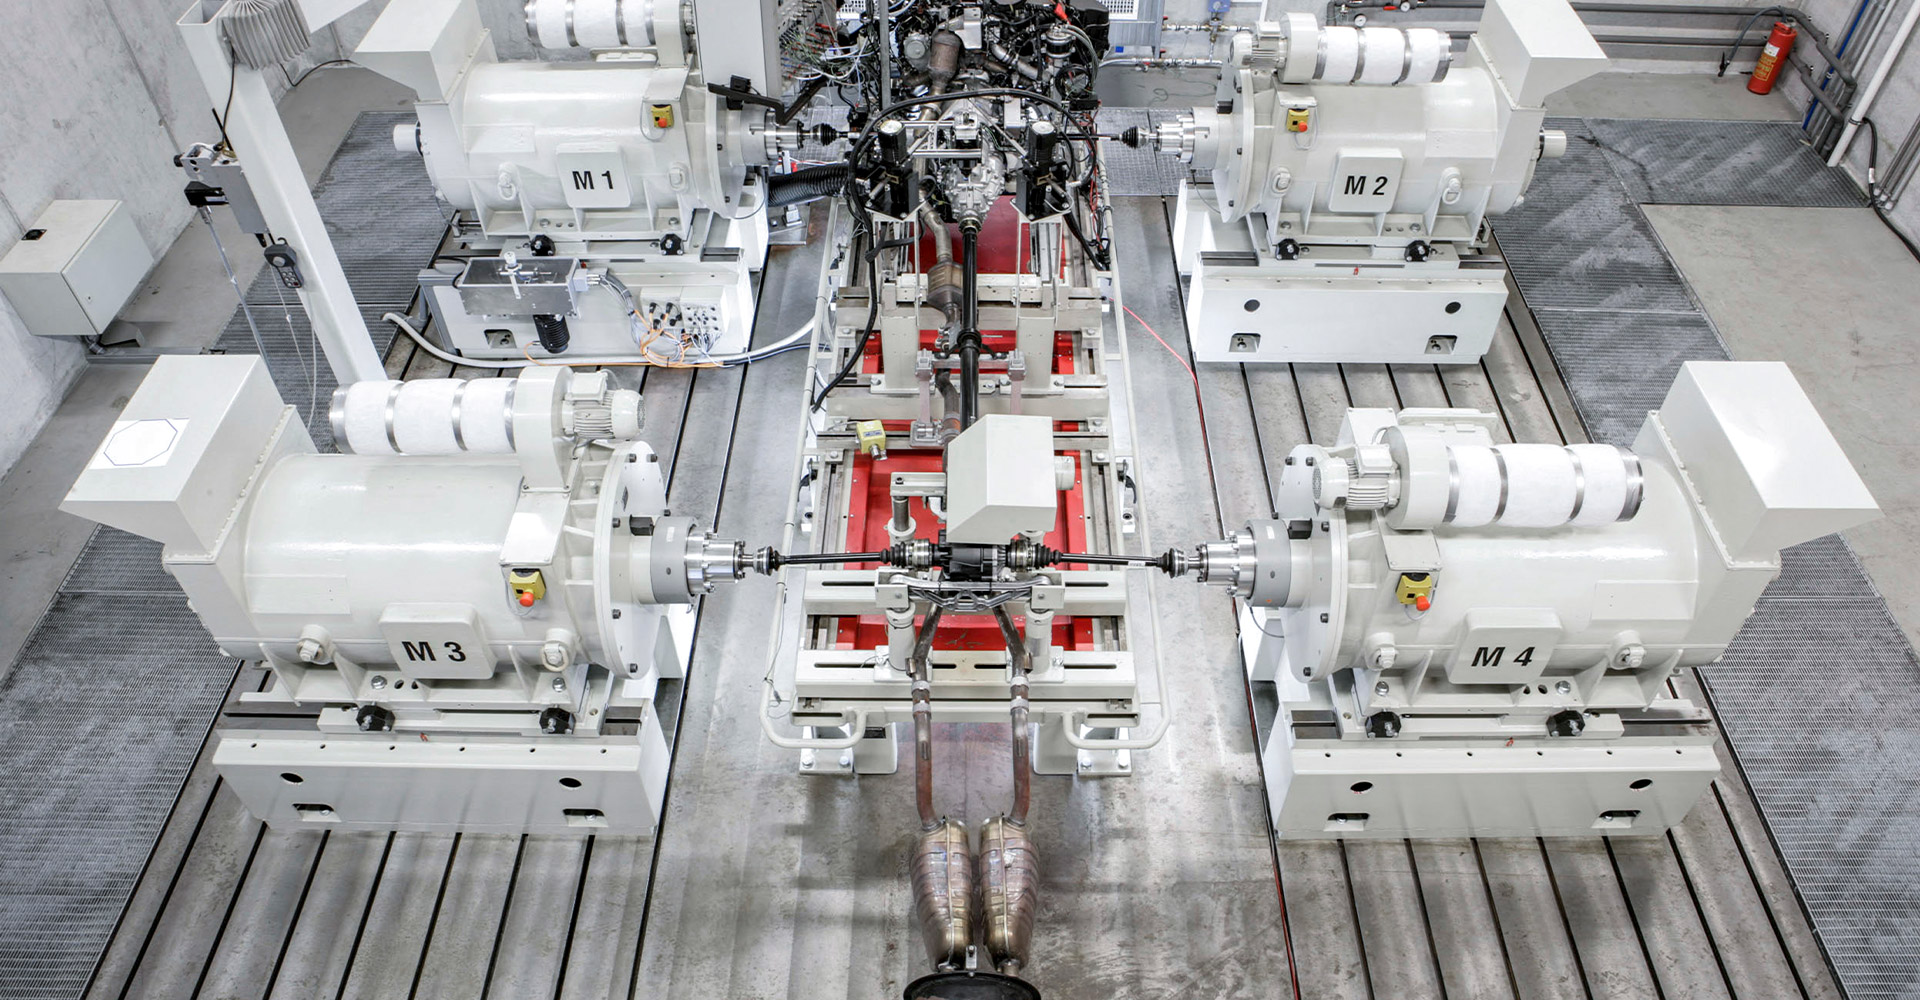
The dimensions of test benches for heavy-duty vehicles inevitably go beyond those needed for passenger vehicles or light commercial or utility vehicles. What is needed are special torque measurement technologies and torque sensors of a particular size that must be able to precisely and dynamically measure the arising high torque values. While drivetrain tests are carried out on passenger vehicles or light commercial vehicles with a few thousand newton metres (Nm), the measuring range in off-road or heavy machines can reach several hundred kilonewton metres (kNm). An ATESTEO test bench for vehicles with all-wheel drive will illustrate how measurement technology works for these higher ranges.
ATESTEO has the expertise and facilities for developing and producing measurement technology for torque measurements on the drivetrain, even for heavy-duty commercial and utility vehicles.
Torque measurement technology for special vehicles and applications
At the ATESTEO test bench for vehicles with all-wheel drive, the torque sensors used are based on the way strain gauges operate. Dimensional changes (that is, deformation and strain) can be directly measured through voltage fluctuations on a strain gauge measuring bridge.
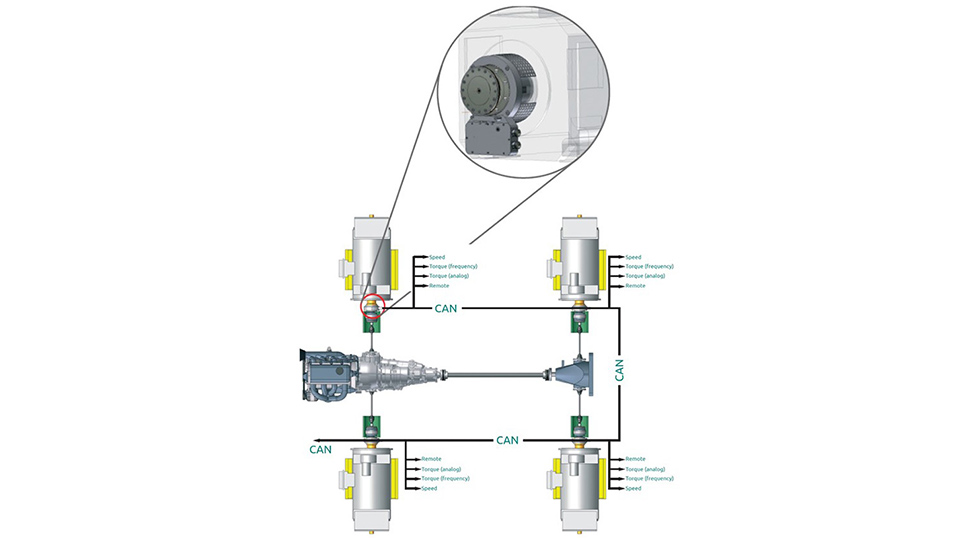
Therefore, the torque sensor of the ATESTEO torque measurement system Fx iS consists of the rotating part (for example, on the machine), the stationary part to transmit measured values, and the analysis electronics that supply the analogue and digital measurement results.

How a torque measurement sensor works
From the stator, electrical power is transmitted over the coils (inductors) to the rotor. This supplies a voltage to the strain gauges, which are applied at the measuring element at a suitable location. A deformation (strain) is able to be measured through the change in resistance in the range of millivolts per volt. This resistance signal is amplified and converted with a very low group delay time into a frequency (in this case, 60±20kHz). A microcontroller and analogue/digital (A/D) converter are used to exclude the temperatures measured in the rotor and the associated resistance change of the strain gauge. The processed measurement signal is transmitted by infrared LEDs to the stator and further to the evaluation unit.
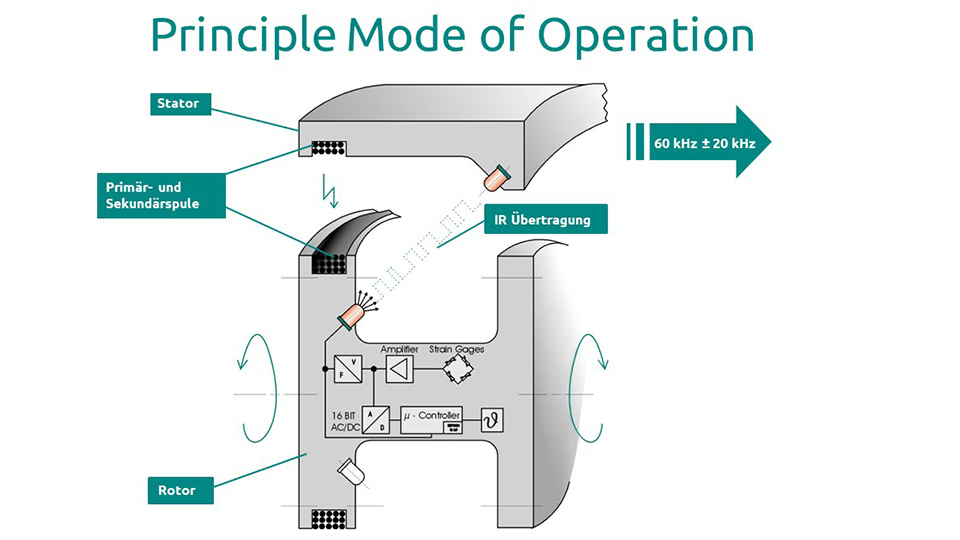
The measurement principle of the ATESTEO torque sensor.
Adaptation of the measurement principle to larger dimensions
The measurement principle from stator to rotor is also found in torque transducers of larger dimensions. However, in this case, the entire production chain is faced with challenges. In detail, the following production steps are affected by this and have to be adapted, each step for itself, to the larger scale.
- Mechanical production of the torque sensor and of the stator
- Mounting of the strain gauges
- Application of the coil for the voltage supply
- Temperature compensation
- Calibration
- Final test
- In-house transport
- Packaging and shipping
Development of the torque sensor suitable to the size of the application
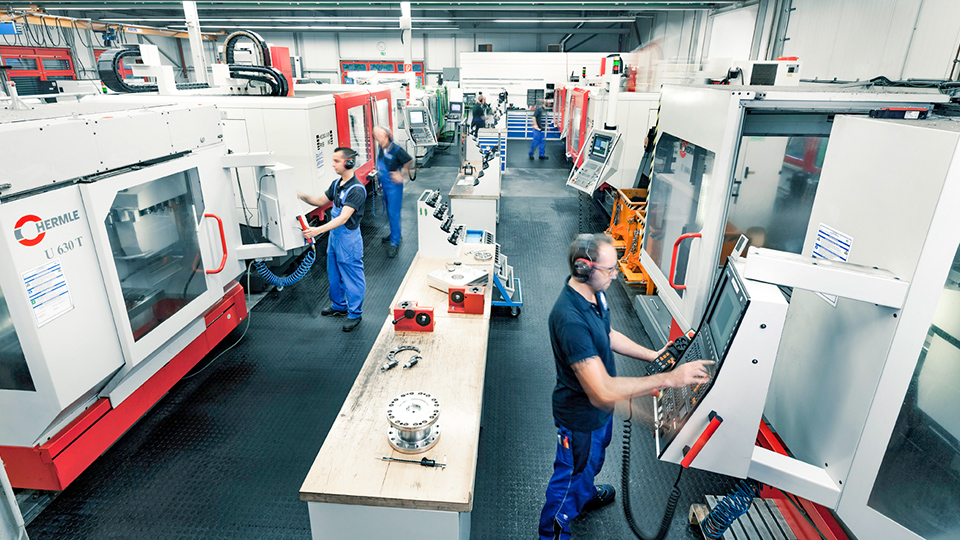
With the development of torque sensors appropriate to the sizes needed for larger commercial, utility, and heavy-duty vehicles, ATESTEO lays the full foundation for meeting the challenges of testing heavy utility vehicles, heavy-duty vehicles, rail vehicles, and off-road applications using reliable processes. At the start is the blank. In the case of a 250 kNm torque sensing flange, the blank can weigh, for instance, over 500 kg and have a 60 cm diameter and a height of 25 cm. Owing to their many years of experience in this field, the specialists at ATESTEO know all about the challenges of developing torque sensors in oversized dimensions. The required steel qualities for these sizes have to be planned and ordered well in advance. To shape the desired contour of this size of measuring element, production has to take place in special processing centres. At ATESTEO, this is possible without difficulty.
Construction of the torque sensor
Once the measuring element is mechanically finished, the next challenge is applying the strain gauges. Positioning them on larger sensors is simpler than doing so on very small measuring elements. However, the pressing device has to be adjusted according to the internal dimensions of the hollow shaft. The choice of a suitable adhesive is between hot glue and cold bonding glue, depending on which sufficiently large ovens or air conditioners, respectively, are available for the curing process. Applying the wire wound coil is done with the help of a special turning device. This makes the torque measurement sensor manageable in a controlled and horizontal position. Installation of the transmitting electronics and transmitting diodes is without difficulty because the space in which to install them is sufficiently large. The temperature compensation then takes place in the air conditioner which has already been used for the curing process.
Calibration of the torque sensor
Finally, the torque sensor is calibrated to deliver reliable measurement data later. For the calibration, ATESTEO uses the very large sized (XXL) test bench according to a reference principle. Depending on the estimated accuracy, there are two possibilities for this: On the one hand, calibration up to the nominal torque, or on the other, partial calibration plus mathematical extrapolation. Then all functions of the torque sensor are tested on the test bench for final testing and the torque sensor is made ready for shipping.
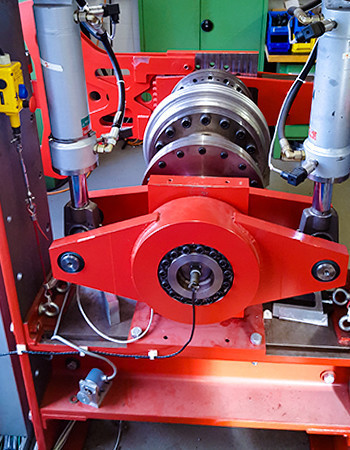
Torque sensor calibration on an XXL test bench

